Developer - Raj Shekhar
Ported by Imtiaz
Ported by Imtiaz
Features -
Android L inspired
Light themed
Android M bootanimation
Android M sound
Android L framework animations
Android L themed statusbar
Android L themed recent apps
Android L themed notification panel
Sim name and weather in notification panel
Lollipop themed Framework
Lollipop platlogo with Lland game
L list selectors
Animated icons in statusbar
Shake to clear Ram
Fab in messaging and calender
Cm12.1 App icons
Cm12.1 signal icons
Cm12.1 battery icons
Settings themed like Lollipop
All other apps themed
Stock Camera
Nova material launcher as default
Marshmallow Launcher
Cm12.1 Music player and AudioFX
4 Ways reboot option
Expandable volume panel
Delete button after taking ss
Mystic Fibres in Settings which contain all Mystic features
Partition info and changelogs in About MysticOS
ListView Animations
Toast Animations
Media Scanner on boot
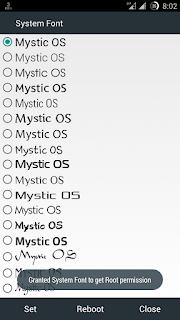
CLock, engineer mode, fonts chooser, scheduled power on off, MysticOS wp and weather settings integrated to settings
Clock & date option
Ram progress bar
Dynamic System Bars
Battery Bar
Carbon Battery styles
Carbon Network Traffic
Cpu info in statusbar
Carrier label in statusbar
Enabled Multi Users
Autostarts and build prop modder option
Lcd density changer
Pre rooted and busybox installed
Some build prop tweaks
More figure out urself
::::::: Procedure for Flashing a custom rom via CWM recovery :::::::
#go to cwm recovery by pressing (power button+ volume down button)
#select wipe/data factory reset >>> then select yes.
#Select wipe cache partition>>>then select yes.
#then select mounts and storage>format/system>yes format
#then select advanced option>>> then wipe dalvic cache and wipe battery stat.
#then Return to the main menu again.
#select Install from sd card > install zip from SD card > select –Custom Rom> yes.
#then a process will occur.
#wait untill it finished.
#then reboot your Primo ZX
::::::: Procedure for Flashing a custom rom via TWRP recovery :::::::
# Power off your phone.
# Turn your phone on in recovery mode (by pressing VOLUME UP + POWER buttons).
# Go to TWRP { Also known as Recovery Mode. }
# GO > WIPE> ADVANCED WIPE> SELECT - DALVIC CACHE, CACHE, DATA, ANDROID SECURE, SYSTEM AND THEN SWIPE TO WIPE
# THEN A PROCESS WILL START AND WAIT UNTILL IT FINISHED.
# THEN SELECT- BACK AND RETURN TO MAIN PAGE.
# NOW THE FINAL PART- SELECT - INSTALL> SEARCH YOUR ROM
# AND THEN SWIPE TO CONFIRM FLASH.
# WAIT UNTILL IT FINISHED.
# THEN WIPE CACHE/DALVIC CACHE.
# REBOOT YOUR PHONE/SYSTEM REBOOT.


Comments
Post a Comment